
Do you need to know my favourite snow images suggestions to enhance your winter images?
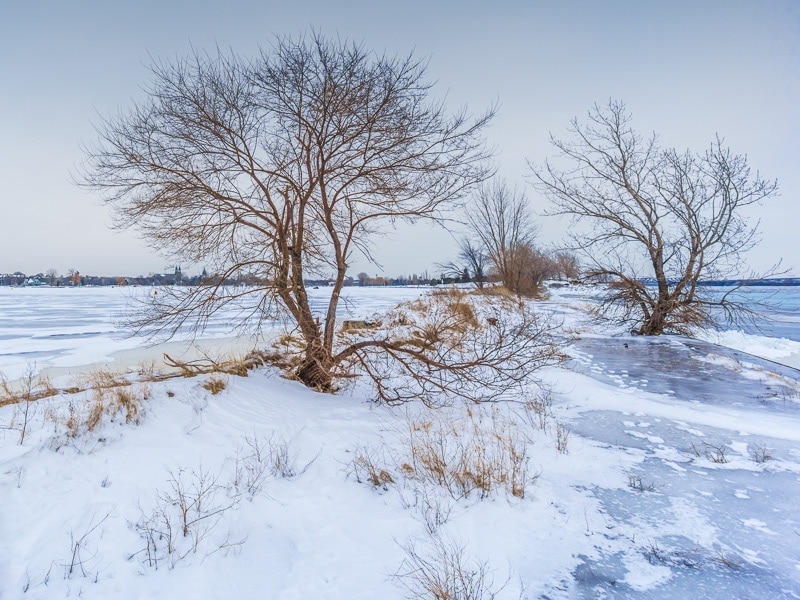
The winter season presents panorama and journey photographers distinctive alternatives that can not be replicated.
Right here, in Montreal, now we have lengthy winters with loads of snow. As a rule, I can shoot snowy landscapes from the center of December till the tip of March. And immediately, I need to share with you ways I strategy winter images.
Since taking pictures and enhancing winter landscapes presents a distinct set of challenges, I’ve separated this text into two elements. First, we sort out the challenges of taking pictures and, then, we tackle the challenges of post-processing.
Snow Pictures Ideas: Capturing
The principle problem of photographing snowy landscapes is the predominantly white coloration.
The white tends to idiot the digicam’s metering techniques by making it consider that the scene is way brighter than it really is. To compensate, the metering system lowers the publicity and, because of this, we get underexposed pictures with ugly gray snow.
Under are my favourite suggestions and methods on tips on how to correctly expose snowy landscapes.
01. Shoot in RAW
The RAW format provides you a much wider latitude to appropriate your errors in post-processing. The logic right here is easy: you attempt to accumulate as a lot data from the scene as doable and determine what to do with it later.
Associated: RAW vs JPEG

02. Use Publicity Compensation
That is my favourite method—the one I at all times use when taking pictures snowy landscapes.
Since I do know upfront that my digicam’s metering system might be deceived by the abundance of white snow, I set the publicity compensation worth between +1 and +2 stops for all my pictures.
I have a tendency to not tweak the publicity compensation worth for each shot and think about the +1 worth to be a dependable center floor for many pictures. I discover that it’s a lot less complicated to do the ultimate high quality tuning in post-processing.


03. Do Not Belief Your Digicam or Your Eyes
When taking pictures winter landscapes, choosing the right publicity is at all times a high quality steadiness. The intention is to make sure the snow in your pictures is as white as doable with out being pure white (clipped). As quickly as any given pixel in your {photograph} turns white, it not carries any data and it’s not possible to get better any information from it throughout enhancing.
As you already know, you can not belief the metering system when taking pictures snowy scenes. However, on the identical time, you can not rely solely in your eyes when taking a look at your digicam’s LCD display or digital viewfinder as a result of it’s not doable to tell apart pure white from nearly pure white.
The maths is the one reality right here.
Associated: Good Publicity With Each Shot
You will need to test the histogram, which is the graphical illustration of the pixels distributed within the picture, to see in case your picture comprises pure white pixels.


04. Bracket All Your Photographs
Bracketing all of your winter pictures serves two most important functions. First, it provides you a chance to pick the picture with the proper publicity for those who miscalculated the publicity worth or in case your digicam was fooled by the brightness of the scene.
Associated: Bracketing in Pictures
Second, it permits you to use the HDR enhancing method in case the scene’s dynamic vary exceeds the dynamic vary of your digicam sensor. Whenever you can not seize all the vary of sunshine in a single shot, you possibly can at all times mix the bracketed pictures into the HDR picture.
05. Use the Lens Hood
First, I at all times suggest protecting the lens hood on always to guard the delicate and costly glass from unintended harm. However, when taking pictures the snow, the lens hood can also be a really efficient device for lowering the glare from the snow.

Winter Pictures Ideas: Modifying
Modifying snowy winter scenes has its personal distinctive difficulties and hurdles. The principle concern is the predominance of 1 coloration (white), making most winter pictures monochromatic. Inventive choices are extra restricted with snowy winter landscapes than colourful scenes of autumn landscapes.
I developed the Winter Colours Assortment as a part of my Lightroom preset library. Every preset within the assortment was designed to beat the assorted challenges of enhancing snowy landscapes and provide you with extra inventive prospects to select from.
06. Take away Blue Coloration Forged
Whenever you shoot sunny winter scenes with the open sky, it’s virtually assured that the snow can have an unnatural blue coloration solid within the shadowy areas. It is because the scenes have two gentle sources: the daylight and the skylight. Once they combine collectively, they produce pure gentle. However, within the shadowy areas, the daylight is shielded, making the skylight the principal gentle supply. Consequently, it shifts the pure gentle towards the blue spectrum.
The most typical approach to get rid of the blue coloration solid is to regulate the colour steadiness within the digicam earlier than taking pictures or later in post-processing. I’m not too keen on this selection as a result of, by shifting the colour steadiness towards hotter tones, you get rid of the blue coloration solid in shadow areas whereas additionally introducing a yellow solid in open areas that makes the snow yellowish.
My answer is to desaturate the blue colours within the {photograph} whereas boosting the opposite colours.
I’ve the Crisp Morning preset within the Winter Colours Assortment that does precisely that.


(Preset: Crisp Morning)
07. Deliberately Introduce the Coloration Forged
For inventive functions, attempt to introduce the colour solid to simulate the nice and cozy colours of the sundown—for instance, when the snow by no means seems to be pure white.
My Winter Colours Assortment has three presets that introduce numerous coloration casts to pure winter scenes.

(Preset: Ice Sample).

(Preset: Candle Gentle).
08. Revive Gloomy Overcast Scenes
On winter days when the 2 most important sources of sunshine—the solar and the sky—are shielded by overcast clouds, the panorama tends to be at its most boring and bland with out a trace of any colours. My answer is to be very aggressive with saturation and distinction. The objective is to revive any hidden colours and emphasize the snow’s texture and the ice.
I created the Snowflake preset particularly for overcast winter pictures. However, for those who apply it to {a photograph} with a wide-open sky and a blue coloration solid, the outcome might be horrendous.

(preset: Snowflake)
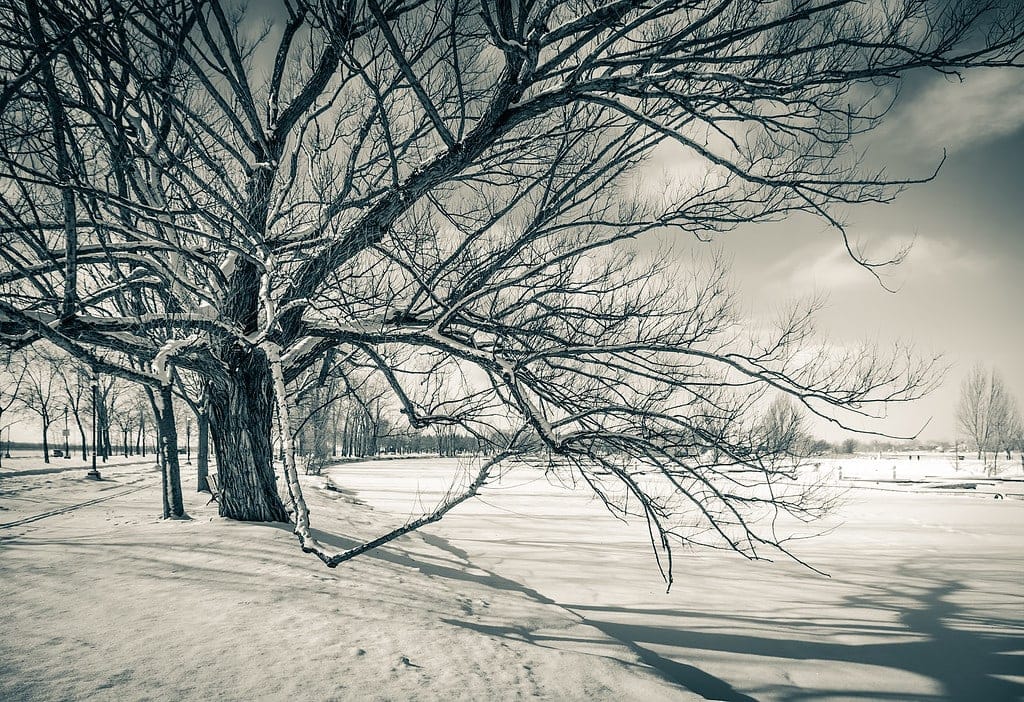
09. Use Black & White Remedy
Due to the monochromatic nature of winter landscapes, it is extremely efficient to make use of black and white conversion. This works with just about any snowy scene. You discard the colour data from the picture and focus on the tonal vary as a substitute. Utilizing distinction and readability changes, you might be far more aggressive in your enhancing.

(Preset: Lifeless)
10. Use Duotone Remedy
The duotone method is once you introduce a second coloration to a black and white picture. The method was extensively used through the printing press period to save cash on manufacturing through the use of solely two colours as a substitute of 4. Today, the duotone method is usually used for inventive functions.
Lightroom can simply obtain the duotone impact by changing a photograph to black and white after which introducing a second coloration utilizing the Break up Firming device.
(Preset: Chilly Fingers)

(Preset: Tough Edges)

“Winter Colours”
Lightroom Preset Bundle
Lightroom workflow bundle consists of Look Presets, Adjustment Presets, Opacity Presets, Reset Presets, Modifying Formulation..
Snow Pictures Ideas | Conclusion
Snow images is a improbable approach to seize the fantastic thing about nature. With easy taking pictures and enhancing suggestions and observe, you possibly can create beautiful pictures of your winter panorama.